Saturday, October 29, 2011

busy with pastries

Busy day.  My sister received orders of 100 buko pies and 20 cassava cakes today, aside from their daily quota and the walk-in customers buying pizza from her Pizzeria.  Sis and her angels have been cooking and baking since 5am!  The orders were delivered tonight.  They're just closing as of this moment.  :D

Of course, I helped her.  And I took pictures too.. :D

Trois Buko Pie

Trois angels busy packing the pies

Trois angels packing while selling other pastries and sweets to a customer

Trois Buko Pie handmade label

Aside from helping my dear sister, I also played with my baby boy and started with my new furniture project for my Blythes.  Busy, busy, busy but still very happy. :D

I hope you are enjoying your loooong weekend too! :D Happy Halloween!

Friday, October 28, 2011

some thoughts on dolls and an inspiring friend

I'm so happy today because I've found out that the readership of my blog is growing. :D  And also because I feel that my muse is back.  Yes, it was missing for a time.  But since it is here with me now, I am going to make it official that I will start a new weekly post.  Yey!

This project is something really close to my heart.  Do you remember my girls Maria, Pepper, and Mariko?  I think, I haven't introduced them properly here yet.  Anyway, when I got pregnant and learned that I was carrying a boy, I stopped playing with my dolls.  I kept them in my closet for the longest time.  Now that we have transferred to our new little house, I had them displayed on the top most level of our bookshelf.  I placed them high enough so my nephew and my son could not see them, unless we carry these little boys.  

I've been dreaming of a doll house for my girls ever since I got Maria.  But until now, they have none.  After hearing Ben-Hur's lecture in Baguio, I got inspired to finally start my girls' house.  And also, after being bombarded with pictures of my friend's doll houses (which is turning into a village now),  I finally decided to turn my dollhouse ideas into reality.

This is just a glimpse of my friend's growing village.  My friend's craftroom is getting filled with dolls!  Click on the photo to visit her site. :D

So friends,  I would like to announce that I will go back to playing with my dolls (when my baby boy is asleep). :D  And that I will be sharing with you the development of my dollhouse  on a weekly post, and on a cutify page dedicated only for my Blythes (Watch out for this!).  I will definitely start this weekend.  If you love dolls and have dolls, you can join me in developing a totally handmade dollhouse because I will also be sharing photos of how-to's.

I'm excited!  :D  I hope you are too! :D

Wednesday, October 26, 2011

Our happyness

Perry started rolling on his tummy 3 days ago. It was a very wonderful experience for me and my dear hubby.  We were also so glad that he succeeded while we were already with him.  If he did it a day earlier, we would be late to witness this milestone.


He is now 3 months and 20 days old and is starting to own our bed at night.  We prefer that he sleep in between us.  It is our only chance to bond together as a family during weekdays because me and my DH both have work from 8 to 5.  So it has always been a pleasure and a very good stress reliever for us to go home to a smiling little Perry.


He is our sunshine.  :D

And Seth too, of course.


They are cousins but we want them to grow close like brothers.  Seth is a year older than Perry. Soon, they are both gonna turn their grandma's house upside down. :D


Tuesday, October 25, 2011

Special Libraries' Congress in Baguio City

I've been m.i.a. last week because hubby and I attended the 1st National Congress of Special Libraries of the Philippines (1st NCSLP) held at Hotel Supreme Convention Plaza in Baguio City.  The WiFi access in our room was intermittent so I just enjoyed our trip without online connectivity.  Hubby and I are actually academic librarians now but we are still active members of the Association of Special Libraries of the Philippines (ASLP).  The topics discussed in the Congress were very informative and useful even for academic libraries.  The speakers were all masters of their own field.  The accommodation and food were excellent.  So i would like to give Kudos to ASLP officers and board for a successful national congress! =D  

Here are glimpses of what I enjoyed in Baguio last week...

    Hotel Supreme's food are excellent! Well, except for the longanisa.  I was expecting a more garlicky flavored variant.

... our hotel room

... and the city view from our room

 ... Mayor Mauricio Domogan's poetic welcome remarks

... company of friends and colleagues

... half slab bbq ribs with salad from Canto : a bogchi joint

... yes I finished this

... see =D honestly, it is truly delicious! =D

... if you happen to be in Baguio, I suggest you try this bogchi joint.  It is located at lower Engineer's Hill beside 7-11 and in front of the DTI Staff House.  

... Ben-Hur Villanueva's lecture on Designing and Re-designing your Libraries

... Ben-Hur made us create a 3-d image of anything under the sun with just a piece of colored paper.  No scissors, no glue, and no crayons were used.  I made a dollhouse.  He inspires me.  He told us that lack of materials or budget is not an excuse to stop a person from creating things.  He is not just a National Artist, he could also be a master DIY-er. =D  


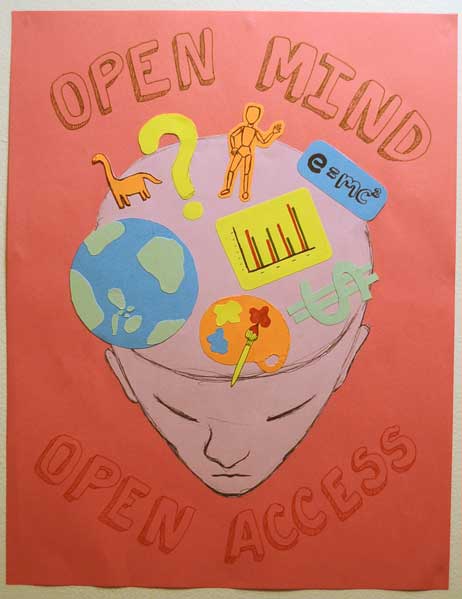
... then he asked us to create a poster advertising our library.  This time, we could use coloring materials.  However, I only have a glue and 3 pens (red, green, and black) with me.  So I made use of the different colored papers available.  This poster is a collaboration between me and my hubby.

... I won these prizes for the poster. =D

The book on the left is really nice.  It is a compilation of German illustrators of picture books and children's books. 

Here are my favorite artists from the book...


(He's like a Heavy Metal artist.  I love his art!)


Perry and I will surely have a good time looking at the illustrations in the book.  =D

Monday, October 24, 2011

Weekend Baking - Apple Pie with Crumb Topping

I have always been a BIG fan of apple pie, even McDonald's.  My favorite apple pie was the one sold at the UP College of Law canteen when I was still in college.  That was more than a decade ago.  As much as I can remember, it has a cookie crust and a crumb topping.  So for this weekend, I have decided to start my quest for the most delicious apple pie for me and my family's taste.

I searched online for various ways of making the crust, the filling, and the topping.  And below is my first apple pie experiment...


Crust Ingredient & Preparation:

1 1/2 cups graham cracker crumbs
3 tablespoons sugar
1/2 teaspoon cinnamon
1/3 cup butter, melted

(however, I wanted a thicker crust so I increased the ingredient by 50% more)

1. Preheat oven to 375 degrees F.
2. In a bowl, combine all ingredients. Mix well and press into a 10-inch pie plate and up the sides.  Bake for 8 to 10 minutes.  Remove from oven and cool completely.

Crumb Topping Ingredients & Preparation:

1 1/4 cup flour
1/2 cup brown sugar
1 1/2 teaspoons cinnamon
1/4 teaspoon nutmeg
1/4 teaspoon salt
1/2 cup butter, melted

3. In a bowl, combine all dry topping ingredients.  Pour cool melted butter into the dry mixture.  Toss and cut until small to medium sized chunks form.  Break up large chunks as needed.  Refrigerate until needed.

Filling Ingredients & Preparation:

3/4 cup sugar
2 tablespoons flour
1 teaspoon ground cinnamon
1/8 teaspoon ground nutmeg
1 teaspoon vanilla
1 tablespoon lemon juice (I used calamansi juice)
4 medium-sized Granny Smith apples and 1 large Fuji apple, peeled and sliced
(original recipe suggested 6 cups apple chunks)

4. In a large bowl, mix sugar, flour, cinnamon, and nutmeg.  Gently stir in lemon or calamansi juice, vanilla, and apples.  Spoon mixture into the crust-lined pan.
5. Bake for 35 minutes and remove from oven.


6. Place the crumb topping mixture on top.  Place back in the oven and bake for another 45 minutes.  Cover with foil if it begins to over brown.

Allow the pie to rest and cool before serving.


Enjoy!


Family Rating:
me - 5
hubby - 5
daddy - 3.5
mommy - 3 (She wanted sweeter apples)
sister - 3

I hope my next apple pie experiment will satisfy my parents' and sister's tastes.

If you happen to try my recipe, please let me know how much did you enjoy it too. =D


Saturday, October 15, 2011

D.I.Y. - Car Pocket Pillow


My baby boy turned 3 months old 9 days ago.  I made him a pocket pillow in the shape of a car.  This is pure hand-sewn because I do not own a sewing machine yet.  The front wheel of the pillow is quite deformed maybe due to my sewing.  Nevertheless, the pillow is still cute.  =D  So here is how I did it...


Materials:


...and fiber fill.  I forgot to include it in the picture.


Procedure:


1. Draw and cut your pattern on a manila paper.  Download pattern here.


2. Trace your pattern at the back side of your patterned cloth.  ***If you are using the same cloth for the back of your pillow, make sure to invert your pattern before tracing it for the 2nd time.  If you will use a solid color cloth, like I did, you can trace your pattern either way.


3. Provide a 1/2 inch allowance from the line of your pattern when cutting the cloth.


4. Cut the windows of the car pattern.  These will serve as pocket openings.
5. Trace and cut these openings on your cloth for the front of the car.
6. Trace and cut the 'car doors' (red arrows) that will serve as your car pocket.  Trace and cut the wheels too, so your wheels will have a different color than your car body.
7. (The picture shows pieces of 2 cars, except the back.)  Now, you should have 5 pieces for 1 car.  a. front of the pillow; b. front wheel; c. back wheel; d. pocket; e. back of the pillow.

  
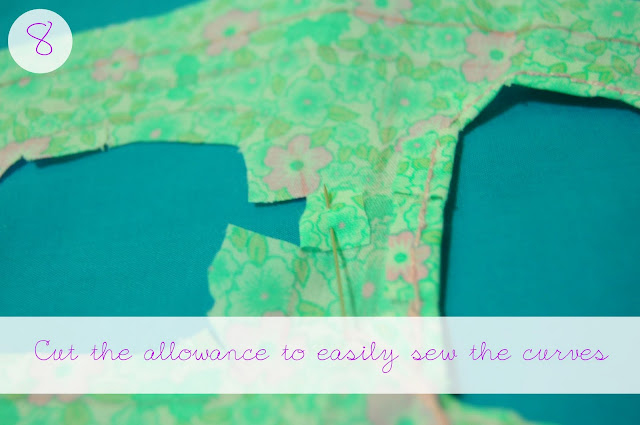
8. Start sewing your car windows.  Cut the allowance to easily sew the curves.


9. Start sewing the pieces together.  Start by connecting the wheels to the front body. The front wheel should be on the outside and only half of the back wheel should be showing.
10. Embroider the line separating the 2 doors on the front body.
11. Sew the pocket on the body.  The stitches should look like an embroidered outline of the 2 doors.
12. Embroider your desired design on the front body.
13. Attach / Sew the front and back body of the car together inside out.  Leave a small opening for you to insert the fiber fill.  Invert the pillow case through the small opening.
14.  Wash and iron the pillow case. (optional)
15.  Fill the case with fiber fill.
16.  Blanket stitch the opening.

And you're done! =D


Your child can hide toys in this pocket.  Or you can hide surprises for your child here too.

Look at how happy my little baby is with his new pillow. =D


Happiness! =D