Tuesday, September 07, 2021

Weekend Sewing - Blythe Dress and Panties

Hello lovelies!

Yesterday, I was able to do some sewing for the dolls. I ordered three factory Blythe last week for my nieces - Summer, Snow and Aila. And knowing that these dolls will arrive naked, I thought of sewing some clothes for them. Also, my cousin, Hazel, has been bugging me to sew some panties for her dolls too. So I started yesterday with the undies.

I watched a tutorial in YouTube on a very easy and simple panty pattern. Just trace the stock panty on a cardboard or paper and you will have a pattern. It was not that simple though. I did it then sew one panty based on the pattern and it turned out big. So I made some adjustments just to see how it will fit. And as I adjusted the panty, I adjusted my pattern too. Then I made another one and it fits perfectly. I made 5 with gray cloth aside from the prototype.

That panty was easy because you just need to sew the sides to connect the front and back. No sewing was necessary for the waist or leg holes. Undies of some recently released Blythe dolls are just like that. Just find a stretchable cloth, cut the pattern and sew the sides. So simple and easy. The cloth I used for the panties is from a real panty. It is new of course. Before the pandemic, whenever I go to the market, I look for cute panties with dainty designs. I have collected about 10 panties with stripes and little flowers on them. The colors are lovely too.


The gray panty I used yesterday has already been cut. I cant remember what I did with it. Probably a pair of long socks that I cannot find anymore! Lol. So I just used the remaining cloth for my prototype. Aside from the 6 panties, I was able to cut 2 more pairs of socks (one short and one long) from the remaining cloth. I will post a tutorial and share the patterns on my next post.


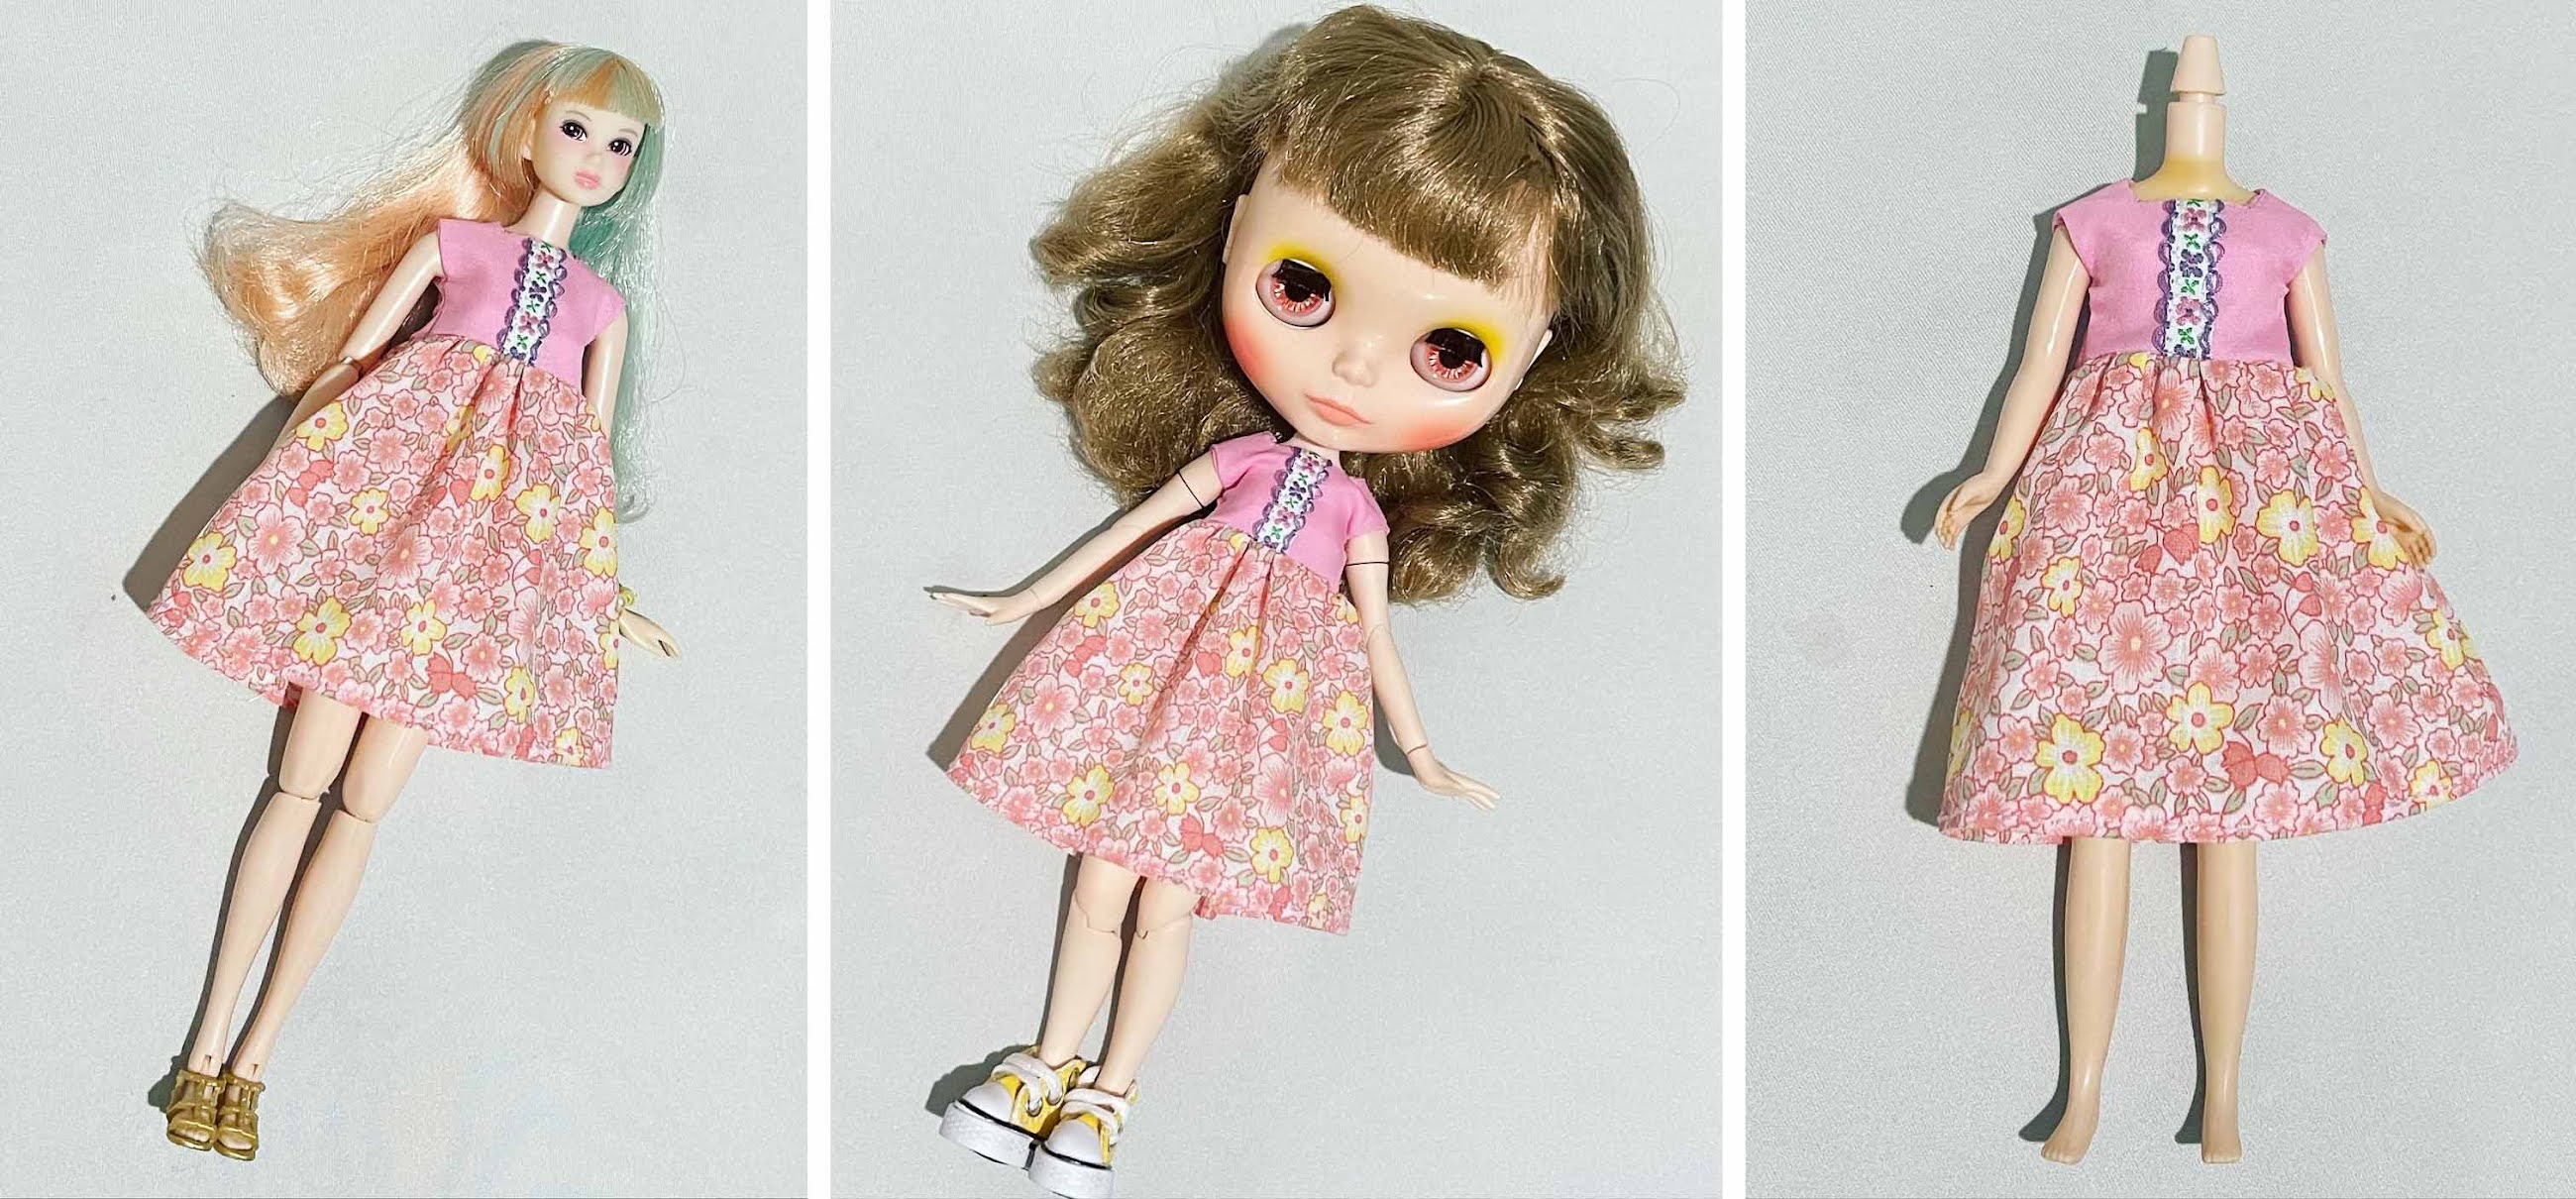
After the undies, I made a simple dress based on the pattern I got from the tutorial video of Creative 404 in YouTube. It was perfect for a stock Blythe body and for a Momoko doll although a bit short. But it is a little tight on top for an obitsu body with a bit of a bust. I might have to make some adjustments with that.


I am quite happy with what I have accomplished yesterday. What creative endeavor did you do last weekend? Share it with me in the comment section below. :)

XOXO,
Ails

Friday, August 20, 2021

Baking Banana Bread Using an Air Fryer

Hello lovelies!

I missed baking. The last time I baked was almost a decade ago, when Perry was still 1 or 2. Now he's 10! 

I have been watching a lot of YouTube videos on what bread to bake in my air fryer because we do not have an oven yet. I wanted to bake because there were times when I do not have anything to eat for snacks given my current situation (diet and lifestyle change; bitter taste due to chemo). I saw lots of recipes for sourdough, pan de sal, dinner rolls and pizza. But today, I decided to bake a banana bread that I watched from Pro Home Cooks. Having fruits in your snacks is always good.


I asked Lincoln to help me. He turned 5 years old last July and our fun and creative activities together have not been documented here as much as with my eldest. For years, I was preoccupied with other stuff and forgot how this hobby - blogging, together with arts and crafts and baking - makes me happy. 

I prepared all the ingredients first before I asked Lincoln to join me. It's my first time baking without an oven so I prayed for our activity to be successful. 


Lincoln wanted to do everything on his own. The only time he asked for my help was with the bananas. He said it was tiring. Hahaha We only used spoon and fork to mash it. 


The baking pan I used was a round ceramic dish that can fit in my air fryer. When we put the batter there, it was almost full to the brim. There was just half of an inch allowance. I got a bit worried that the bread might overflow. I was not sure if it will happen. So I decided to transfer some batter in 3 ramekins. 


Aside from that, I had to experiment with the temperature and length of baking time using my air fryer. I decided to try 150C for 25 minutes. After 25 minutes, I wasn't sure if the inside and bottom of the bread were done, I decided to add 5 more minutes of baking time. Then after that, I increased the temperature to 200C for 2 minutes because I wanted a crisp crust. 


And luckily, we succeeded! The bread was cooked, It has a crust that I love. The moisture is just right. And according to the boys, it was yummy! I could not tell because there is still that bitter taste in my mouth from my therapy 6 days ago. But based on how they ate the bread, I believe them! 


So here's how we did it. 

BANANA BREAD 

Ingredients: 
- 3 medium ripe bananas 
- 1/3 cup olive oil 
- 1/3 cup honey 
- 2 eggs - 1/4 cup milk 
- 1 1/2 cups all purpose flour 
- 1/4 cup instant oats 
- 1 tsp baking soda 
- 1 tsp cinnamon powder 
- 1 1/2 tbsps almonds chopped 
- 1 1/2 tbsps walnuts chopped 

Process: 
1. Mash the bananas in a bowl. Mix all the wet ingredients together with the bananas. 
2. Sift the flour, baking soda and cinnamon in a separate bowl. Add the oats. Mix thoroughly. 
3. Add the wet ingredients to the dry ingredients. 
4. Add the nuts (almond and walnuts) and mix thoroughly. 
5. Pre-heat the airfryer at 150C for 5 minutes. 
6. Pour the batter into the baking pan/dish. 
7. Bake at 150C for 30 minutes. (The ones in the ramekins were done in about 10 minutes.) 
8. Remove from air fryer and let it cool down a bit before removing the bread from the baking pan/dish. 
9. Serve and enjoy!

You can incorporate chocolate chips or raisins instead of nuts or all of them altogether. If you try this recipe, please tell me how it turned out. :)

xoxo,
Ails