Showing posts with label miniature. Show all posts

Thursday, March 12, 2020

DIY Miniature Coffee Shop

Hello lovelies!

How have you been in a year? Did you miss me? 😊 Coz I missed you!

Let us make this comeback exciting by sharing with you a DIY miniature project that i finished the other night. I bought this from Lazada last June but i only had a few hours in 3 nights last year assembling its little details.    


A ninja delivered it to me safely after weeks of waiting. I was so happy when I received this because the first time I ordered, the shop sent a wrong item. They refunded my money but imagine the frustrations I've been through before I finally have this.

When I opened the box, i saw that the items are packed separately. Each ziplock bags are labeled with letters so that you will know what it is for based on the instruction book. The box contains scissors, a ruler, a cutter, tweezers, craft glue and super glue.  The shop description said that it has no dust (acrylic) cover and no musical box. So, this cafe only has lighting fixtures. My son would probably love it more if it plays music.


That night, I started working on the display shelves. Oh it was so fun! My heart was full as I went to sleep. 

Then I got so busy with work so I set it aside. After a month, I was able to squeezed it in my schedule one evening and worked on the table and chairs.


I was not able to take photos or videos of each item in the set. But here is the last picture of what I accomplished last year. These are the menu boards and some more pastries.

Then, the other night, I felt the urge to finish my miniature cafe. The assembly was really easy except for the light fixtures that I will explain later. The picture below shows how I did the tulips. These flowers are so fun to make. I didn't know before that these little wooden beads would pass as tulips when used with wires and green crepe paper!


The cafe has 4 lights. There are 2 inside for the ceiling, 1 at the round signage and 1 under the umbrella. The first 3 are easy to put in place. My problem was the one under the umbrella. First reason is that the instruction book did not say how the wiring will connect to the switch. Second is that the wires of the 4 lights are equal in length but the one under the umbrella is the farthest and requires longer lines. So before I put the walls in place, I put the lights in their proper places and check where the lines/wiring will pass through. The pictures below will show how I did it. 


However, it is still too short that I had difficulty attaching it to the switch. If you are going to make this, you should have an extra set of wires to make it longer. You should also plan ahead where you would let the wires pass so it will not be as visible as mine.

Also, try the lights if it is working as soon as you open the box and once again before installation. I did not try mine even before installation.  When all are set and glued, I turned on the lights and it did not work. 😞 My dear husband will get a new set of batteries for this so I am still hopeful! 

Here are some more close up pictures of my miniature cafe.

I ❤❤❤ this cake display and flower pots! 

I ❤❤❤ the coffee maker! 

 Pretty neat sandwich bar!

Here is the side view of the cafe. 

And a close up photo of that. 

 And this is the side where the switch is (and where the music box should be!).

This is the top view.

A close up image of the umbrella table. 

I hope you enjoyed the trip to my mini cafe. Let's have coffee! 😊❤

xoxo,
Ails

Monday, March 18, 2019

Playing with Air Dry Clay

Hello lovelies!

Last Christmas, Santa gave my sons this cute kitchen play set that Perry has requested. The play set is not just for play cooking. It has tubs of clay and some molds to encourage the child to play with clay and develop creativity. Now that those tubs of clay were gone, I bought an air dry clay from the market. I had the chance of knowing this type of clay when I looked for some party loots for Perry's 7th birthday. The clay used to be in small tubs but when i came back to buy again this year, it was just packaged in resealable plastic bags. It is very cheap but it is perfect when making toys or miniatures from clay. No baking is needed.

Last night, I decided to play with the air dry clay and the kitchen set. Ivy joined me and we created a lot of food stuff for Lincoln to play with!


I started making sunny side up because my son like it and he always use that mold when playing.

Then Ivy made an apple. It's the biggest one in the picture. I made the rest. There's no mold for that so we sculpt it ourselves.

I also made bananas without any mold while Ivy was making carrots.


Aside from those, I made fried chicken legs and Ivy made lettuce and colorful seafood (crabs, lobsters, fishes, and shells).


We had fun playing with clay but our joy was doubled when we see how much Lincoln enjoyed our creation in the morning. 

The clay dries up fast. It is still soft when dry but it retains its shape even if you press it. But it can be torn apart or gets easily destroyed if you intend to. It is not like the baked clay which turns hard and plastic-like. But still, I want to create more miniature stuff from it for my dolls soon. Also, I will try painting some of what we made to see how it will react to acrylic paint.


How about you? How did you enjoy your weekend? :)


Friday, March 01, 2013

Coptic Stitch Binding and Miniature Books

Hello lovelies!


I made some mini books for my girls.  I accidentally cut a bit of my finger while cutting paper but it's ok.  It's worth it.  Even my little one enjoyed playing with this bookshelf with lots of "boo" (books). I have also made little balls of yarn because I made a mini Crochet book.  My son also played with the "bo" (balls). :-D


And...Hurrah! I just learned a new skill!  I played around with some little bits of paper, a sewing needle and a thread and I finally got how bind using coptic/chain stitch!  I practiced on a mini book.  I haven't tried the technique on a 1:1 scale yet.  But who cares, right? If it worked, it works. lol  I've started listing down projects using this technique! Excited much! :-D 


What skills are you learning or improving on right now?  Share it here and I'll give it a try. We always have to learn something new, right? Have a lovely weekend!

Wednesday, November 09, 2011

Wednesday Blythe - Dresser / Drawers DIY

I made another furniture to house my Blythe's socks, pants, and other blouses.  This time, I recycled some trash and turned them into a cute dresser!  


This tutorial is a lot easier than the first one.
 

Materials:

2 Spam tin cans (If you are a healthy eater, ask your neighbors for these. I'm sure they'll save you some)
4 ballpen bottom caps 
Illustration Board
Paper Scraps 
Beads
Craft Glue
Double-sided Tape (thick)
Scissors / Cutter
Ruler
Pen
Paint/s
Brushes


Procedure:

1. Draw the above pattern on your illustration board.  Each drawer measures 3 x 3 x 1.5.  Trace the Spam tin opening too.  2.  Cut the patterns. You should have 2 of each.  3.  Cut lightly the lines on your board.  Make sure to cut only halfway through the thickness of your board.  This will enable you to fold the sides of your drawers easily. 4. Fold the sides of your drawers.

5.  Get one drawer and fold the sides.  6.  Glue a piece of scrap paper to fasten the corners.  Make sure to apply generous amount of craft glue. 7. Glue all corners of each drawers.  8. Place the drawers on top of the oval-shape side. 

 9.  With some scraps of paper, glue the 2 pieces together.  10.  Use the tip of your scissors to make sure that there is no space in between the paper scrap and the board.  Glue all sides of the drawers.  If you want, you can also glue on the inside.  Just use paper scraps of the same color as your board if you are not painting the inside of your drawers.  11. Use wooden clothespin (or paperclips) to keep the pieces in place while drying.  12.  As you dry the drawers, start working on the Spam tin cans.  You will notice that there is a gap in between the two.  We are going to fill this gap in order to attach both tins together.

13.  Place thick double-sided tapes on one of the tin cans.  The numbers 3,3,2,1 on the picture indicate the number of double-sided tapes piled up on top of one another.  14. Press the 2 tin cans together while sitting on top of your table to ensure that they are aligned with each other.  15.  Then work on with the feet.  Fill the ballpen bottom caps with craft glue and crumpled scraps of paper.  16.  Make sure to fill these up to the brim.  

17. Place a double-sided tape on the brim of the ballpen caps.  18.  Tape these caps on your Spam tin can.  These will be the feet of your dresser.  19.  Test the strength of the feet.  20.  Test the drawers on your dresser. 

21.  Paint your dresser.  I used 2 coats of acrylic paint.  Dry completely the 1st coat first before applying the 2nd coat.  22.  When the paint is completely dry, prepare your paints and beads for decoration.  23.  Glue the beads that will serve as your drawer knobs.   24.  Then glue or paint your design on your drawers! Have fun with this part! :D

Congratulations! You now have a handmade Blythe dresser! :D 

Add doilies or table runners on top of your dresser and place picture frames, flowers, and other miniatures to personalize the dresser according to your Blythe / doll's personality.  


I hope you enjoyed this tutorial. :D

Monday, November 07, 2011

Sneak Peek on What's Coming this Wednesday

Pardon me but I am just uber excited to share this!


Coming right up this Wednesday! See you! :D

Wednesday, November 02, 2011

Wednesday Blythe - Dress Rack and Hangers DIY

Hello!

We've had a very busy holiday here.  So please pardon me if I haven't shared a Weekend Baking recipe last Sunday.  I also haven't had the chance to take photos so I will not be able to share how we spent our 1st of November here.  My son was a star yesterday and he was very cooperative even if we came home late from the cemetery. It was a lovely day.  I hope you enjoyed your holiday too! :D

As promised, to myself, I have started making stuff for my dolls' future house. Yey! :D

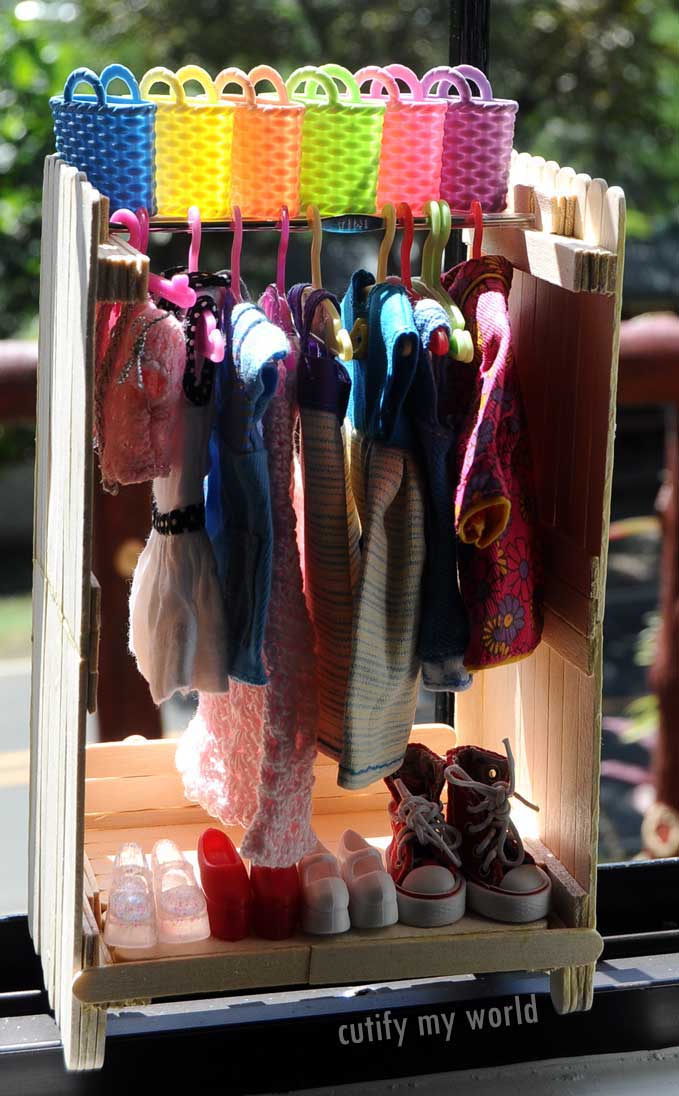
I have been dreaming of having a closet for my dollies to store and display their dresses.  The available ones in the mall are mostly Barbie's and in hot pink!  I did not like the style.  So for my first Blythe furniture,  I made a simple but cute dress rack!


See the supplies and instructions on making this dress rack below.


Supplies:
popsicle sticks   
metal rod (I used a crochet hook that I no longer use) 
tacky / craft glue     
scissors   
ruler   
pen    
acrylic paint   
brushes   

1. Line and cut one end of 8 popsicle sticks like pictured above.  2. cut the ends of 2 more popsicle sticks, sized according to the width of the 8 sticks.  3. Brush enormous amount of glue on the 2 sticks.  4.  Place the sticks on both ends like pictured above to gather and put in place the other 8 sticks.  This will serve as the side of your dress rack. Make 4 of this if your sticks are the same length as mine (around 4" long).

 5-6.  Glue together 2 of the sides like pictured above.  7.  Do the same for the remaining 2.  ***This is unnecessary if you are using longer popsicle sticks (like the ones available in Starbucks).  This length is all I've got so I had to make them longer.
8. Cut 5 more sticks for each sides' top/upper part.  Glue them on top of each other.  Do the same on the sides' bottom/lower part.  9.  Gather the cut ends and sized it according to the sides' bottom/lower part.  10.  Glue and pile them up together like pictured above.  This will enable your rack to stand better. ***The reason for the piled up 5 sticks is that my crochet hook is longer than the length of the popsicle sticks.  
11. Cut squares from the sticks / cut ends.  Prepare 12 squares.  12.  Glue the squares (3 layers each) on sticks 4 and 5 on each of the sides' top/upper part.  Make sure that there is enough space in between, sized to the width/diameter of your rod.  This is where you will insert the ends of your metal rod / crochet hook.  13.  Create the rack's base and a top shelf. For the rack's base, glue together 8 popsicle sticks like pictured above.  For the top shelf, I glued together 2 1/2 sticks. 14.  This is optional.  I glued sticks on the back of each side.  15.  Place the rack's base and top shelf on their places.  These strengthen the rack and prevent it from swaying especially when the metal rod is removed.  Make sure to always brush huge amount of glue on the sticks.    Then place the rod on its proper place. 

16. Let it dry completely.  Then test the strength of your rack by hanging some dresses.  and Ta-Da!
You now have a doll's dress rack! :D     


Now paint it or glue patterned paper on it.  You can design it with whatever you like.


I painted mine light blue. soo cute, isn't it?

Here is a simple tutorial on making your own dress hangers using pipe cleaners. :D

How to make your own dress hangers:

Materials needed: pipe cleaners and cutter/scissors (optional: beads and other embellishments)

Instructions: 1. Cut pipe cleaners 2 inches long.  One hanger uses two.  2.  Wrap around the middle of a 2-inch pipe cleaner the one end of another 2-inch pipe cleaner.  3. Insert beads to make it cuter.  And you're done! So easy, right?

 Test the hangers on your dress rack.

Then fill it with dresses! 

I will be very grateful if you will share your thoughts on this by leaving a comment below.  And don't forget to include the link of your creation too when you try this.  You can also share photos in this flickr pool that I started. :D  Enjoy!